
Rosie's Fitted Top Tutorial
 Charlie Bradley Ross
Friday, 10 January 2014
Charlie Bradley Ross
Friday, 10 January 2014
Today our dear Rosie, from DIY Couture, will make a lovely fitted top.
Hi! my name is Rosie and I set up DIYcouture, a project that produces visual clothes-making instructions that aim to be accessible to people with little sewing experience, partly as a way of providing choice for those that are not happy about buying unethical high street clothing.
There are a lot of great ethical clothing companies out there, but a lot of ethical clothing is still perceived as being unaffordable. When I started DIYcouture, I felt that being able to sew clothes was a little step closer to wearing ethical clothing; at least you can be certain that the person that made your clothing has not been abused in the workplace as that person is you! I feel now that by sewingclothes, we can empathise more fully with people that produce the clothes we buy from the high street. Making clothes helps me value how much work goes into creating a garment, and helps me reevaluate what clothing is worth. Making clothes does take time and patience and is a completely different experience from that of the “quick fix” high street purchase.
I was so happy to discover Offset Warehouse as it meant I could make truly 100% ethical clothing.
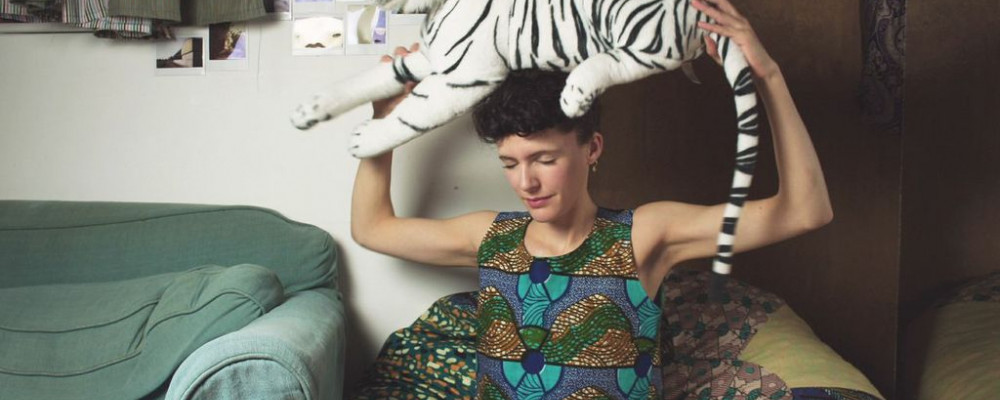
I made a simple cotton top this summer, based on a shirt I already own. The tutorial here is an even simpler version of this top. As you can see, it is pretty seasonally inappropriate as it has no sleeves and is cropped at the waist! However, it could make a lovely present for someone to enjoy wearing when the whether warms up.
I advocate a carefree approach to sewing. It is easy to get worried about precise details and measurements, or whether your line of stitching is perfectly straight, but when you are sewing simple clothing it is the overall appearance of the garment that counts, not a slightly wonky hem or asymetrical neckline!
I loved using this African fabric from Offset Warehouse which my boyfriend named ‘Mountains and Fountains.’ I am wearing it here with some trousers I made also from Offset Warehouse!
Tutorial
Mountains and fountains; a simple fitted top.
I used a simple copying process to make a basic, fitted top. Take a top that you already like. Ideally it won’t have sleeves, but most importantly it won’t be stretchy. You can use a long sleeved shirt or blouse and just fold the sleeves out of the way. I’ll call this template top a blouse here, for simplicity’s sake.

You’re going to mark out the front of your blouse first. Try your blouse on and carefully put a pin into the fabric at your ‘bust apex’ on both sides. This is the pointiest peak of your boob! Put a couple of pins into the blouse roughly at the level you would like the bottom of your final garment to hang. Take the blouse off carefully.

Lay your fabric out with the wrong side facing upwards. Lay your blouse on top of it. The pins at the bottom of the blouse should sit roughly 6cm above the bottom edge of the fabric. You are going to lose some length when you add darts, and also when you hem the bottom, so you are leaving this extra room to compensate.

Draw around the top with tailor’s chalk, with your lines sitting roughly 1.5cm away from the edge of your top. You will probably notice that the seam at the shoulder of your blouse sits at the front of your top. You need to make your chalk mark run under this seam line, so fold the bit of excess fabric out of the way


You need to transfer the position of your ‘bust apex’ pins onto your fabric. Put a stitch into your template blouse where one pin sits, so that it nips the fabric too. Do this on both sides. Lift your template blouse away. The stitches will remain in your fabric. Using a ruler, draw a line running all the way across the outline of the top, joining up the two bust apex points. Your line should be perfectly horizontal, as the bust apex points should sit at the same level!

From the bust apex point, draw a line that slopes downwards and hits the side of your top about 1cm below the original line. Do this again, with the third line sitting about 1cm below the second. You also need to add a little wedge of fabric to the overall shape of your top. Repeat this marking process on the opposite side.

Now you need to cut out your shape. So that it is perfectly symmetrical, cut around one half, then fold it across to the opposite side, matching the armpit point and shoulder point if possible and use it as a guide to cut the second half.

You need to sew the darts into your front piece. Tilly from ‘Tilly and the buttons’ has a really excellent explanation of how to sew darts, with detailed photographs, here -http://www.tillyandthebuttons.com/2013/02/stitching-darts.html
With your darts in place, you’re going to mark out the back of your top. This has a couple of key differences; there are no darts but there is a bit of additional height at the shoulder area.
Lay the front of your garment out on the fabric to use it as a guide. You can freestyle extra height at the shoulders – about 3cm should do the trick – or you can get your original blouse out again, lay it in position and drag the shoulder seam line upwards to see where it falls

With both pieces cut, you are going to join them together. Lay the front piece out with the right side facing upwards towards you, then lay the back piece on top of it, with the right side facing downwards. Pin the shoulders together first, and sew them together with a line of straight stitch.
Then match up the sides and pin then sew them together.
Try the top on to check that it fits over your head. If not, trim away the neckling until it does!
You are going to finish the neckline and arm holes with bias binding. You are going to sew the binding to the outside of your top, then fold it to the inside so that it is completely invisible. You need to use a fairly wide bias binding, XXcm wide or thereabouts. The first step is to cut it in half right down the middle

With your top turned the right way round, pin the unfolded side of the bias binding all the way along the edge you are finishing. Your bias binding will bend to fit the curved shape of these edges. You can manipulate it to bend by pulling it gently.


Pin it all the way round the armhole. When you get to where you started, tuck the end of the bias under and position it below the bit you started with.

Sew the bias to the top, all the way round till your stitches get back to where you started. Trim off the bias and fabric, fairly close to your stitches
Fold the bias to the wrong side of your top

Fold your bias to the wrong side of your garment. Iron it into place, so that it can’t be seen from the right side of your garment. Then pin and sew it into place.
Hem the bottom of your garment by folding a small amount of the edge up inside the garment and sewing it down with straight stitch.

Thank you, Rosie! find more of Rosie’s projects here.